Wednesday, November 23, 2011

Beef Roast with Parsley Tomato Sauce

Giada is my hero - gorgeous, and boy can she cook.  I bought a beef roast at a local market by our house and stared at it when I got home.  I had never cooked a beef roast, and didn't even know where to start in making this meat into something the hubby would eat.  I knew where to turn when Giada popped into my head.  I came across this Beef Roast with Parsley Tomato Sauce recipe, and I gave it a go.  I also had potatos and carrots in the fridge, so i used those as a side.  I saw Jamie Oliver (is everyone that cooks adorable?) teaching how to roast the perfect potato, so I used his tricks and they turned out divine.  He boils the potatoes and carrots for 10 minutes, removes the carrots, and then fluffs the potatoes in the colander prior to roasting.  You then get a slightly crispy outside of the potato.  So good!!


Beef Roast with Spicy Parsley Tomato Sauce
Ingredients:
1 (2 to 2 1/2 pound) sirloin tip or chuck roast
3 tablespoons olive oil
4 roma tomatoes, hlaved lengthwise
2 teaspoons herbs de Provence (I didnt' have this so I just threw a couple other herbs on there)
Kosher Salt and Fresh Ground Pepper to Taste
1 1/2 cups fresh flat-leaf parsley
2 garlic cloves
1/2 teaspoons red pepper flakes
3/4 teaspoon kosher salt
3/4 teaspoon freshly ground black pepper
2 tablespoons red wine vinegar
1/2 cup extra virgin olive oil

Directions:
1. Preheat the oven to 375 degrees.  Season the beef with salt and pepper.  Season the tomatoes with salt, pepper, and herbs de provence.
2. Heat the olive oil in a medium, heavy roasting pan or dutch oven over high heat.  Sear the beef on all sides until browned.  Place the seasoned tomatoes around the seared beef and place the pan in the oven.

3. Roast until a meat thermometer reads 130 degrees F for medium rare, 135 degrees for medium, which is about 30 to 40 minutes.  Tent the roast loosely with foil and let it rest for 10 to 15 minutes.  The internal temperature of the meat will rise 5 degrees F more and the juices will redistribute into the roast.
4. While the meat rests, place the parsley and garlic in a food processor and pulse until the parsley is finely chopped.  Add the red pepper flakes, salt, red wine vinegar, and the roasted tomatoes and process until pureed.  With the machine running, add the olive oil in a steady stream.  To serve, slice the roast and arrange on a serving platter.  Drizzle a little sauce over the meat.  Serve the remaining sauce in a bowl alongside.

That dinner was fabulous!!!  And I even made some amazing peanut butter cookies for dessert!

Thursday, November 17, 2011

Grasshoppers Galore

When I was watching Bug's Life when I was little, I always wondered about some of the bugs.  Back in Vegas and California, we didn't encounter very many bugs.  If you did, they were your run of the mill spiders or cockroaches.  Until I moved to Minnesota, I didn't understand why people complained about bugs.  Normally if you were clean and sprayed your house a couple times during the year, you didn't get very many bugs in your house.  Well, once we moved to Minnesota my bug tolerance was thrown out the window.  There are a lot of bugs here.  I was eaten alive by mosquitoes when we first got here until I made my own bug repellent, and couldn't believe the amount of spider webs around our house.  We cleaned them, then the next day they were all there again.  Those spiders work overtime in the Midwest to make sure you are stuck admiring their webs day in and day out.  We have gotten the spider webs under control, but I am continually amazed at all of the new bugs I get to see for the first time.

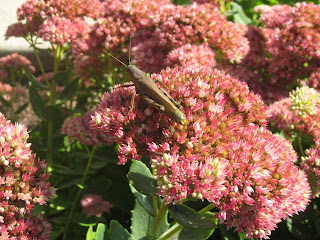
Our younger golden retriever, Lola, was staring at the same bush for at least 10 minutes and I couldn't wait to check out her new obsession.  I smiled when I saw this large bug lifting itself onto the top of this flower as our golden nudged it with her noise to make sure it kept moving.  I saw my first grasshopper!   They are huge, and they jump and scare the crap out of you every time you walk in the grass.


Wednesday, November 9, 2011

Minnesota Colors of Fall

It is so amazingly beautiful here in Fall.  Autumn brings out colors I have never seen before, and I cannot believe how warm the weather has been this year.  I guess it is rare out here to be 80 in October, so I am sucking up all of the sun and warm weather I can get.  I took a walk through Haas Lake Park with Lola today and captured some of these awesome pics of the leaves changing on the trees behind our house.  My photos will never do the colors justice, but you can get the idea.


Tuesday, November 1, 2011

Canning Salsa

I have always wanted to learn how to can vegetables, fruits and fillings.  I eat salsa a ton, and started making it for myself so I could make it healthy and the way I want it.  (This seems to be a reoccurring theme lately).  Canning is always a little intimidating since you don't want to eat food that has gone bad, which is my biggest fear.  I decided to dive in head first.


Ingredients:
4 cups of tomatoes (I recommend roma tomatoes as they are not as liquid)
2 peppers (or more if you want it really spicy)
1 cup of chopped onion
1 clove of garlic
1 tsp salt
Pepper to taste
1/2 bunch of chopped cilantro
1/2 tablespoon of cumin
Lime Juice
A sprinkle of sugar

Directions:
1. Prepare  your canning jars by washing them in hot, soapy water.  I always keep the jars warm so they don't break.  Fill your stockpot with enough water to cover the jars with at least one inch of water and heat to a simmer.
2. Combine all of the ingredients in a food processor and pulse until mixed.
3. In a large stainless steel saucepan, bring to a boil over medium heat, stirring frequently, until slightly thickened.  I recommend about 10 minutes or so.
4. Ladle the salsa into jars, leaving 1/2 inch headspace.  Remove the air bubbles by running a plastic knife along the sides, and remeasure headspace.  Wipe the rim, and center lid on jar.  Screw the band until it is fingertip-tight, but now really tight.
5. Process the filled jars in boiling water for 20 minutes.  Remove the stockpot lid.  Wait for 5 minutes, then remove jars.  Cool the jars and store for up to one year.


Update - There will be standing liquid towards the bottom, which is normal.  You should shake up the salsa prior to using.  Roma tomatoes eliminates the excessive liquid seem in these pictures, which I found out the second time around.

Wednesday, October 26, 2011

DIY Cornhole Game Boards

I wanted to make something awesome for my hubby, Matt, for his upcoming birthday.  He mentioned a cornhole set (or bean bag toss, as some of you in the Midwest call it) a couple of times, and again at our housewarming party.  I decided to give it a go, since I had already been doing a ton of painting and staining work around our house.  I figured it couldn't be too hard.  
Materials Needed for Cornhole Boards:
Two pieces of ½ inch thick plywood cut to 2-foot x 4-foot
Four, 8-foot 2×4’s
Four, 4½ – inch long, 3/8-inch long carriage bolts
Four, 3/8-inch flat washers
Four, 3/8-inch wing nuts
1 box of 2½-inch wood screws 
wood filler
Paint and Poly Sealant

I found the basic cornhole measurements on the Master Cornhole Association website so it would be competition ready.  And off I went.


Cut the 2×4’s. You will need 4 pieces at 21-inches each and 4 pieces at 4-feet each. 


Using the 4-foot and 21-inch pieces, construct the tables’ frames with wood screws.


Measure 9-inches from the top of the plywood pieces and 12-inches from the sides and mark a center point for the hole. Use a compass to draw a circle 6-inches in diameter. Cut 
the hole with a jigsaw.


Using the remaining 2x4 pieces, I cut four pieces for the legs of the boards.  They will need to be at least 12 inches long.  I rounded the opposite ends of the legs so I could fold them away for storage.  I drilled a hold in the frame and through the rounded end of the leg to attach.  I didn't get pictures of this since I was doing it alone and couldn't hold the camera and attach the legs.  The carriage bolts will fit through the holes, where you can then attach the washer and wing nut.  I then set them up, measured so they were exactly 12 inches off the ground to the top of the board, and sanded them down so they sat evenly.  I sanded the crap out of the top and sides, over and over again until they were really, really smooth.  Then you can paint them however you want.  You can add a poly coat to keep them smooth and protected. Here's the finished product.  The hubby loved them!


Monday, October 24, 2011

Spinach Salad with Strawberries, Avocado, Blue Cheese and Pecans

I had my last summer salad of the year, since I look towards soups and warmer, heartier lunches during the winter to keep me warm.  Now I am going to need those more than ever with the Minnesota air getting cooler and fall in full effect.  The thing I love most about this salad is its color, and it is such a cinch to make when you are busy running around for work.  But boy does it taste good!


Ingredients:
Spinach or Mixed Green Lettuce
Strawberries, sliced
Avocado, chopped
Crumbled Blue Cheese
Pecans
Olive Oil and Balsamic Vinegar

Directions:
1. Mix in the lettuce or spinach, strawberries, avocado, crumbled blue cheese and pecans.
2. Drizzle with olive oil and balsamic vinegar.  Easy as pie!

Thursday, October 20, 2011

Homemade Garlic Hummus with Pine Nuts


I buy and eat hummus a lot.  Once I looked at the ingredient list, I realized this is something I could totally make on my own in larger quantities, saving us money and allowing me to put what I want in each batch.  I tested two versions of this recipe, and this one was my favorite by far.  It makes a ton so if you have a big food processor and eat a lot of hummus like me, this is perfect for you.

Ingredients:
2 cans (16 oz.) garbanzo beans (also known as chickpeas), separated
1/2 cup of the liquid reserved from the beans
About two or three lemons squeezed, or 5 to 6 tablespoons of lemon juice (I used fresh lemons)
3 tablespoons of tahini paste
4 cloved of garlic, crushed or minced
4 tablespoons of olive oil
1 teaspoon of sea salt - optional
1/2 cup of pine nuts

Directions:
1. Drain the garbanzo beans and reserve 1/2 cup of the liquid.
2. Plan the first five ingredients in a food processor (beans through garlic), including salt if you are adding.
3. Turn on food processor and blend for at least three minutes.
4. With food processor on, drizzle in olive oil and blend for 30 more seconds.
5. Add pine nuts and pulse several times, mixing the nuts in but not chopping them up.  You can also sprinkle the pine nuts on top of the dip with a little olive oil.
6. Serve as a dip with chips, vegetables, or pita bread.  I love my hummus in veggie wraps and burgers.  This keeps in the fridge for a couple of weeks.


Let me know if there are other variations of hummus recipes you have tried and love!  I am always looking to expand my recipe book.

Thursday, October 13, 2011

Haas Lake and Lily Pads

One of my favorite new getaways is right in our backyard.  Lola and I have been doing our morning runs through Haas Lake park, ending at the amazingly beautiful and serene Haas Lake.  Haas Lake is covered in thousands of lily pads, with gorgeous lotus flowers that bloom during the summer.


I come here sometimes just to relax and think, allowing myself to disappear in this new environment.  Moving can be tough at times, but we moved to such a beautiful and friendly place.  I am really starting to fit in, find my way around, and enjoy everything this active and wonderful place has to offer.  It is such a slow pace compared to Orange County, and trying to slow myself down has been hard.  I am realizing life is too short to speed through.  I know this is going to be the perfect place to raise our future children.  And when I need a break or just a breath of fresh air, Haas Lake is always here, waiting for me.

Wednesday, October 12, 2011

Happy Birthday Lucy!

My best friend Vikki's baby, the adorable Miss Lucy, was turning one and I wanted to get her something special that would last.  I knew she would be getting tons of clothes and toys, but I wanted to make something for her new room.  Vikki is in the process of building a mega addition onto their house, so something cute for Lucy's room is what I settled on.  I bought a plain white canvas at Michaels, as well as wood letters and acrylic paint.  I settled on purple since I knew Vikki would be going some sort of blue, and I didn't want to totally pick the wrong blue shade.  I figured purple would be prefect.  I painted the whole canvas a darker shade of pastel purple, and painted the letters a light purple, going for the ombre look slightly.  I glued the letters on with Gorilla Glue, which I would not suggest to anyone else out there that wants to try this.  Go for Mod Podge, since it stays clear.  Gorilla glue turns white, and slightly protruded out of some of the sides of the letters.  Besides that, they turned out so cute!!


Happy Birthday Miss Lucy!!!

Tuesday, September 6, 2011

Etching Glass At Home

I bought these amazing glass containers for my sugar, flour and sweets to put out on the counter in the kitchen.  I love, love, love my new kitchen.  It makes me smile everyday.  I read several tutorials about etching glass and figured that if they can do it, so can I.  Seems to be my theme lately.

I started out by taping off the outside with painters tape, and then using stickers to mark off the letters.  I was slightly leery about using stickers, but the lady at Michaels insisted they would block the etching cream.  I used Armour Etching Cream for the project, and saved since we had a ton of painters tape from our house remodel readily avaialble.  I put a decent layer of etching cream in the taped off area and waited the five minutes suggested on the container.


I actually waited closer to 10 before I washed off the first container.  The etching cream barely showed on the glass, and I noticed some of the cream got under the letters, making them not as crisp and clear as I wanted.  I added more cream to the two remaining containers and waited another 10 minutes before washing it off.  The second round turned out better, but the cream still leaked under the tape in several places.  I would suggest using a ton of etching cream and waiting at least 20 minutes before washing it off to make the area clear and solid.  This was my final result, which I might need to redo down the road.


From Warm to Bright

Our new house in Minnesota was ready to move-in right away, and there were not many immediate needs to be fixed.  I really love the layout of our place, and the bones are amazing.  There were just several things we wanted to change to really make it our own....okay, so many more than a few.  One of those major changes was the trim.  The trim was all oak, and there was a ton of it.  Here in Minnesota, they love their oak.  We didn't want to offend or make anyone upset, but we decided to paint the oak white so it went with our taste and style, since we plan on being in this house for  along time.  I started with the guest room and guest room bathroom, with a beach theme to remind us of our previous home.

Painting oak trim is a long, tedious process, but we wanted to do it right so it didn't chip or peel off.  The guest room/bathroom started off looking like this.  

We are sanding first, priming then painting three coats.  I sand in between the first and second coats, but not between the last one.  It has turned out really nice.


Now, I get to start trying to find furniture and decorations....Michaels, here I come!

Wednesday, August 31, 2011

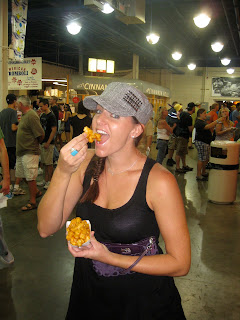
This State Fair is HUGE

This week is the Minnesota State Fair.  Everyone has been talking and talking about this state fair, and it seems like it is the only thing covered on the news here in the Twin Cities lately.  I had to go and see what the hype was all about.  And everyone was right.  The fair is huge, with tons of food, rides and random stuff.  We entered the fair into The Birthing Barn. Yes, I said birthing.  People stand around the watch farm animals give birth....live.  Yes, right in front of you.  We just missed the birth of a cow, but we saw well more than I ever wanted to see.  The only thing that was amazing was seeing mini piglets that were just born.  So freaking cute.

We took off and headed to grab some cheese curds, one of the things this area is known for.  Now I know why I will be gaining 15 pounds.  They are SO GOOD.  Fried cheese, is there anything better??


The grounds of the fair were covered with people.  It is one of the largest fairs in the country, and we decided to go on Sunday of opening weekend.  It reminded me of Oktoberfest in Munich, with swarms of people everywhere.


I ate a ridiculous amount of food, including corn on the cob, a funnel cake, bites of pretzel, local beers, and more food on a stick.  Oh, and we rode a ride for good fun. Thanks Katie for forcing me on at least one.  It was one fair to remember!!

Monday, August 29, 2011

Let's Go For A Drive

Our bags, house and dogs are packed and we are ready to hit the road to Minnesota.  As I packed my flip-flops, I laughed to myself knowing each pair of those will only get use for the four short summer months Minnesota might actually see.  I still did not know what to expect completely, as I had only visited during the freezing cold months of winter, when the snow banks were over five feet tall!

We headed to Vegas for the first resting leg of our trip, and enjoyed a nice dinner with my mother.  The dogs were great and slept the entire car ride.  Woo hoo!! 
We woke up bright and early to head to Denver, Colorado.  The scenery was beautiful from Vegas to Denver, making the miles fly by despite being in the car for almost 12 hours.  We stopped several times to let the dogs out and to grab food for ourselves, but powered through the trip.  Matt and I played several road games to pass the time, and were finally able to catch up on each other’s lives completely.  With all of the recent changes in our lives, from getting married to relocating, warranted many hours of sharing memories of all of the things we will miss in California, to all of the exciting adventures that await us in Minnesota.  Matt told me about all of the exciting excursions we can go on and all of the outdoors stuff we will be looking forward to.  The pups cuddled soundly in the backseat.


We got to Denver around 7pm, and were excited about dinner in the city with the dogs in tow.  We walked to a restaurant about a mile away that had an outdoor patio where you can have dogs, and Matt’s buddy Luke met us.  He brought MacKenzie, his four-month-old Bernese Mountain Dog.  I fell in LOVE.  These are my dream dogs.  And Matt promised me since he was moving me to the snow he would get me one.  MacKenzie just made me want him to hurry his promise along.  Isn't she the cutest?


The next day was the worst portion of the drive, as there is NOTHING to see past Colorado.  From Colorado to Minnesota and throughout the entire state of Iowa, the only you see is farms, farms and more cows.  The rolling plains of the Midwest. 

I have a secret love affair with road trips.  Well, Matt knows and surely feels the same way about this love affair. There is something about getting in a car and discover the world in a different way.  I was so excited to drive through Europe in 2010, seeing things most people never get to see in their life. 

To do for my readers:  Go on a road trip this year.  Burn a cd especially for this trip, grab a friend or a lover, and just drive.

Tuesday, August 23, 2011

From California to Minnesota...

Welcome to my blog! I figured I would entertain my friends by writing about my hilarious and probably never-ending experiences from moving to the sunny and extremely warm beaches of Orange County, California to the coldest place in the United States – Minnesota.  I am trading in my flip flips for snow boots (hopefully cute ones at that).  I only own four sweaters, none of which actually keep me warm.  I have Ugg boots from when they were in style in 08, and own two beanies that are more for fashion than warmth.  I once asked Matt who the crazy person was that was mowing the lawn when there was six feet of snow on the ground.  By the time he finished laughing and explained the concept of a snow blower, I knew if we ever moved there I would be a complete fish out of water.  Well, the time has come. Matt was promoted and accepted a job in the greater Minneapolis area, and me and our fur babies are heading to the midwest.  I am stoked about the kind, hospitable people I am about to encounter, but am deathly terrified of getting behind the wheel in snow.  This should get really interesting…..